Outlook Integration Guide
Overview
The Outlook integration allows your NINA workflows to connect with Microsoft Outlook via the Microsoft Graph API. This integration enables you to send and manage emails, create and track calendar events, and maintain contacts - all directly from your workflows.
Status
The Microsoft Graph API offers a wide range of functionalities. At present, our integration comprehensively supports key endpoints related to email management, calendar operations, and contact handling.
Credential Configuration
Before using the Outlook integration in your workflows, you need to configure credentials for authentication. This requires setting up an application in the Microsoft Azure Portal.
The Outlook integration supports three authentication methods:
| Auth Type | Best For | User Interaction | MFA Compatible |
|---|---|---|---|
| OAuth2 | Interactive users with browser access | Yes (browser sign-in) | Yes |
| Username & Password (ROPC) | Accounts without OAuth2/MFA setup | No | No |
| Client Credentials (App-Only) | Service accounts, automation, no user context | No | Yes |
Setting Up Microsoft Azure App Registration
- Go to the Azure Portal
- Navigate to Azure Active Directory → App registrations
- Note: In Spanish, this appears as "Registro de aplicaciones"
- Click + New registration
- Enter a name for your application (e.g., "NINA Outlook Integration")
- Set the appropriate Redirect URI (only required for OAuth2):
- For POC environment:
https://poc.zynap.com/api/v1/oauth2/callback - For Production environment:
https://platform.zynap.com/api/v1/oauth2/callback
- For POC environment:
- Click Register
- After registration, note down the following values:
- Application (client) ID
- Directory (tenant) ID
- Create a client secret:
- Go to Certificates & secrets
- Click + New client secret
- Add a description and select an expiration period
- Click Add
- IMPORTANT: Copy the Client Secret Value (Not the Secret ID) immediately, as it will not be shown again.
Required API Permissions
The permissions you need depend on the auth type you will use.
For OAuth2 and Username & Password (ROPC) — Delegated Permissions
- In your registered application, go to API permissions
- Click + Add a permission
- Select Microsoft Graph
- Choose Delegated permissions
- Add the following permissions:
- Mail.ReadWrite - To read and create emails
- Mail.Send - To send emails
- Calendars.ReadWrite - To manage calendar events
- Contacts.ReadWrite - To manage contacts
- User.Read - Basic user profile information
- offline_access - For refresh tokens (OAuth2 only)
- Click Add permissions
- Click Grant admin consent (may require admin privileges)
For Client Credentials (App-Only) — Application Permissions
- In your registered application, go to API permissions
- Click + Add a permission
- Select Microsoft Graph
- Choose Application permissions (not Delegated)
- Add the following permissions:
- Mail.ReadWrite - To read and create emails
- Mail.Send - To send emails
- Calendars.ReadWrite - To manage calendar events
- Contacts.ReadWrite - To manage contacts
- User.Read.All - To access user mailboxes
- Click Add permissions
- Click Grant admin consent — this is mandatory for application permissions since no user will be prompted interactively
Security note: Application permissions grant access to all mailboxes in the tenant by default. To restrict to specific mailboxes, an Exchange admin can create an Application Access Policy scoping the app to a mail-enabled security group.
Additional Setup for ROPC
If using ROPC without a client secret (public client), you must enable the public client flow:
- In your app registration, go to Authentication
- Under Advanced settings, set Allow public client flows to Yes
- Click Save
Note: If you provide a client secret in the ROPC credential, this setting is not needed.
Creating an Outlook Credential in NINA
Option 1: OAuth2 (Recommended)
- Click an Outlook node in NINA's canvas
- Click Manage Auth and Add Credential
- Fill in the credential details:
- Name: A descriptive name (e.g., "Outlook Production")
- Description: Optional details about the credential's purpose
- Auth Type: "OAuth2"
- Client ID: The Application (client) ID from Azure
- Client Secret: The client secret you generated
- Scope:
offline_access User.Read Mail.ReadWrite Mail.Send Calendars.ReadWrite Contacts.ReadWrite - Access Token URL:
https://login.microsoftonline.com/{tenantId}/oauth2/v2.0/token- Replace
{tenantId}with your Directory (tenant) ID from step 7 above
- Replace
- Auth URL:
https://login.microsoftonline.com/{tenantId}/oauth2/v2.0/authorize- Replace
{tenantId}with your Directory (tenant) ID from step 7 above
- Replace
- Click Create to start the OAuth2 flow
- Sign in to your Microsoft account if prompted
- Review and accept the requested permissions, if prompted
- After successful authorization, test the credential
Option 2: Username & Password (ROPC)
Use when the mailbox account cannot be enrolled in OAuth2 (e.g., no browser access). Does not work with MFA-enabled accounts.
- Click an Outlook node in NINA's canvas
- Click Manage Auth and Add Credential
- Fill in the credential details:
- Name: A descriptive name (e.g., "Outlook ROPC - Service Account")
- Auth Type: "Username & Password"
- Client ID: The Application (client) ID from Azure
- Client Secret: Optional (required for confidential client apps)
- Tenant ID: Your Microsoft 365 tenant ID (e.g.,
contoso.onmicrosoft.com) - Username: UPN / email address of the mailbox (e.g.,
[email protected]) - Password: Password for the mailbox account
- Click Create
- Test the credential to verify it works
Option 3: Client Credentials (App-Only)
Use for service-to-service automation with no user interaction. The app authenticates as itself and targets a specific mailbox.
- Click an Outlook node in NINA's canvas
- Click Manage Auth and Add Credential
- Fill in the credential details:
- Name: A descriptive name (e.g., "Outlook App-Only - Alerts Mailbox")
- Auth Type: "Client Credentials (App-Only)"
- Client ID: The Application (client) ID from Azure
- Client Secret: The client secret you generated (mandatory)
- Tenant ID: Your Microsoft 365 tenant ID (e.g.,
contoso.onmicrosoft.com) - User Principal Name: Email of the target mailbox (e.g.,
[email protected])
- Click Create
- Test the credential to verify it works
Important: The User Principal Name determines which mailbox the integration operates on. All operations (send email, read calendar, manage contacts) will target this specific mailbox.
Supported Resources and Operations
The Outlook integration supports the following resources and operations:
Message
| Operation | Description |
|---|---|
| Create Draft | Creates a new draft email message |
| Send Email | Sends a new email message |
| Get Email | Retrieves details of a specific email |
| Get All Emails | Searches for and retrieves multiple emails |
| Update Email | Updates an existing email message |
| Delete Email | Deletes an email message |
Message Rule
| Operation | Description |
|---|---|
| List Rules | Lists inbox message rules |
| Get Rule | Retrieves details of a specific message rule |
| Create Rule | Creates a new message rule |
| Update Rule | Updates an existing message rule |
| Delete Rule | Deletes a message rule |
Calendar
| Operation | Description |
|---|---|
| Create Event | Creates a new calendar event |
| Get Event | Retrieves details of a specific event |
| Get All Events | Searches for and retrieves multiple events |
| Update Event | Updates an existing calendar event |
| Delete Event | Deletes a calendar event |
Contact
| Operation | Description |
|---|---|
| Create Contact | Creates a new contact |
| Get Contact | Retrieves details of a specific contact |
| Get All Contacts | Searches for and retrieves multiple contacts |
| Update Contact | Updates an existing contact |
| Delete Contact | Deletes a contact |
Mail Folder
| Operation | Description |
|---|---|
| Create Mail Folder | Creates a new mail folder |
| Get Mail Folder | Retrieves details of a specific mail folder |
| Get All Mail Folders | Lists all mail folders |
| Update Mail Folder | Updates an existing mail folder |
| Delete Mail Folder | Deletes a mail folder |
Attachment
| Operation | Description |
|---|---|
| List Attachments | Retrieves all attachments from a specific message |
| Get Attachment | Retrieves details of a specific attachment |
Parameter Merging and Templating
The Outlook integration takes full advantage of NINA's parameter merging and templating capabilities:
Parameter Sources (in order of precedence)
- Node Parameters: Parameters configured directly in the Outlook Integration Node
- Extracted Parameters: Parameters automatically extracted from the input data
- Input Data: The complete input data from upstream nodes
When an Outlook Integration Node executes:
- It combines parameters from all sources
- Node parameters take precedence over extracted parameters
- Template variables within parameters are processed (using
{{variable_name}}syntax) - The combined parameters are used to execute the Outlook operation
Example: Sending Emails
Basic Email Sending
Below is an example of sending a basic email message:
Node Configuration:
{
  "integration_service": "outlook",
  "resource": "message",
  "operation": "send",
  "parameters": {
    "subject": "Important Security Alert",
    "bodyContent": "<h1>Security Alert</h1><p>We've detected unusual activity in your account.</p>",
    "bodyContentType": "html",
    "to": ["[email protected]"],
    "additionalFields": {
      "cc": ["[email protected]"],
      "importance": "high"
    }
  }
}
The additionalFields object for the Send Email operation accepts the following optional parameters:
| Parameter | Type | Description |
|---|---|---|
from | string | Email address to send from. Allows sending from distribution lists or shared mailboxes. See Sending from a Distribution List or Shared Mailbox below. |
cc | array | Email addresses of CC recipients |
bcc | array | Email addresses of BCC recipients |
importance | string | low, normal, or high |
saveToSentItems | boolean | Whether to save the message in the Sent Items folder (default: true) |
attachments | array | File attachments (see example below) |
Sending Email with Attachments
You can include file attachments in your emails:
Node Configuration:
{
  "integration_service": "outlook",
  "resource": "message",
  "operation": "send",
  "parameters": {
    "subject": "Monthly Security Report",
    "bodyContent": "<p>Please find attached the security report for this month.</p>",
    "bodyContentType": "html",
    "to": ["[email protected]"],
    "additionalFields": {
      "attachments": [
        {
          "name": "security-report.pdf",
          "contentType": "application/pdf",
          "contentBytes": "BASE64_ENCODED_FILE_CONTENT_HERE"
        },
        {
          "name": "vulnerabilities.xlsx",
          "contentType": "application/vnd.openxmlformats-officedocument.spreadsheetml.sheet",
          "contentBytes": "BASE64_ENCODED_FILE_CONTENT_HERE"
        }
      ],
      "importance": "normal",
      "saveToSentItems": true
    }
  }
}
Sending from a Distribution List or Shared Mailbox
You can use the from parameter in additionalFields to send emails that appear to come from a distribution list, shared mailbox, or any other mailbox in your tenant:
Node Configuration:
{
  "integration_service": "outlook",
  "resource": "message",
  "operation": "send",
  "parameters": {
    "subject": "Weekly Security Summary",
    "bodyContent": "<p>Here is the weekly security summary from the Security Operations team.</p>",
    "bodyContentType": "html",
    "to": ["[email protected]"],
    "additionalFields": {
      "from": "[email protected]",
      "importance": "normal"
    }
  }
}
Result:
The recipient will see the email as coming from [email protected] instead of the authenticated user or UPN.
Requirements by Auth Type:
| Auth Type | Requirement for from |
|---|---|
| Client Credentials (App-Only) | Mail.Send Application permission with admin consent. No additional Exchange permissions needed — the app can send as any mailbox in the tenant. |
| OAuth2 / ROPC (Delegated) | The authenticated user must have Send As permission on the target mailbox. This is granted by an Exchange admin via the Exchange Admin Center or PowerShell. |
Note: If
fromis omitted or empty, the email is sent from the default identity: the authenticated user (OAuth2/ROPC) or the configured User Principal Name (Client Credentials).
Personalized Emails Using Template Variables
You can use template variables to create personalized email content:
Input Data from Previous Node:
{
  "recipient": {
    "email": "[email protected]",
    "firstName": "John",
    "lastName": "Smith",
    "role": "Security Analyst"
  },
  "report": {
    "date": "2024-05-12",
    "findings": 5,
    "criticalIssues": 2,
    "summary": "Multiple critical vulnerabilities detected"
  }
}
Node Configuration with Template Variables:
{
  "integration_service": "outlook",
  "resource": "message",
  "operation": "send",
  "parameters": {
    "subject": "Security Report: {{report.date}} - {{report.summary}}",
    "bodyContent": "<h1>Security Report</h1><p>Hello {{recipient.firstName}},</p><p>We've completed the security scan on {{report.date}} and found {{report.findings}} issues, including {{report.criticalIssues}} critical vulnerabilities that require your immediate attention.</p><p>Please review the attached report at your earliest convenience.</p><p>Best regards,<br>Security Team</p>",
    "bodyContentType": "html",
    "to": ["{{recipient.email}}"],
    "additionalFields": {
      "importance": "{{report.criticalIssues > 0 ? 'high' : 'normal'}}"
    }
  }
}
Result:
This will send an email with:
- Subject: "Security Report: 2024-05-12 - Multiple critical vulnerabilities detected"
- Personalized greeting: "Hello John,"
- Dynamic content showing 5 findings and 2 critical issues
- To: "[email protected]"
- Importance set to "high" based on the critical issues condition
Example: Email Retrieval and Folder Management
Retrieving Emails from a Specific Folder
Search for emails in a specific folder:
Node Configuration:
{
  "integration_service": "outlook",
  "resource": "message",
  "operation": "getAll",
  "parameters": {
    "returnAll": false,
    "limit": 10,
    "filter": {
      "folderPath": {
        "mode": "id",
        "value": "/inbox"
      },
      "readStatus": "unread",
      "select": "id,subject,receivedDateTime,from,hasAttachments",
      "orderBy": "receivedDateTime desc"
    }
  }
}
Retrieving a Specific Email
Get a single email by its ID:
Node Configuration:
{
  "integration_service": "outlook",
  "resource": "message",
  "operation": "get",
  "parameters": {
    "messageId": "AAMkAGVmMDEzMTM4LTZmYWUtNDdkNC1hMDZiLTU1OGY5OTZhYmY4OABGAAAAAAAiQ8W967B7TKBjgx9rVEURBwAiIsqMbYjsT5e-T7KzowPTAAAAAAEMAAAiIsqMbYjsT5e-T7KzowPTAAAYbvZuAAA=",
    "additionalFields": {
      "select": "id,subject,body,from,toRecipients,attachments"
    }
  }
}
Updating Email Read Status
Mark an email as read:
Node Configuration:
{
  "integration_service": "outlook",
  "resource": "message",
  "operation": "update",
  "parameters": {
    "messageId": "AAMkAGVmMDEzMTM4LTZmYWUtNDdkNC1hMDZiLTU1OGY5OTZhYmY4OABGAAAAAAAiQ8W967B7TKBjgx9rVEURBwAiIsqMbYjsT5e-T7KzowPTAAAAAAEMAAAiIsqMbYjsT5e-T7KzowPTAAAYbvZuAAA=",
    "updateFields": {
      "isRead": true
    }
  }
}
Example: Calendar Event Operations
Creating a Calendar Event
Create a new calendar event with attendees:
Node Configuration:
{
  "integration_service": "outlook",
  "resource": "calendar",
  "operation": "create",
  "parameters": {
    "subject": "Security Incident Review",
    "start": "2024-05-15T14:00:00",
    "end": "2024-05-15T15:00:00",
    "timeZone": "Eastern Standard Time",
    "additionalFields": {
      "bodyContent": "<p>Meeting to review the security incident from last week.</p><p>Please bring all relevant documentation.</p>",
      "bodyContentType": "html",
      "location": "Conference Room B",
      "isOnlineMeeting": true,
      "importance": "high",
      "attendees": [
        {
          "email": "[email protected]",
          "type": "required"
        },
        {
          "email": "[email protected]",
          "type": "required"
        },
        {
          "email": "[email protected]",
          "type": "optional"
        }
      ]
    }
  }
}
Retrieving Calendar Events
Get upcoming calendar events:
Node Configuration:
{
  "integration_service": "outlook",
  "resource": "calendar",
  "operation": "getAll",
  "parameters": {
    "returnAll": false,
    "limit": 10,
    "filter": {
      "startDateTime": "2024-05-12T00:00:00Z",
      "endDateTime": "2024-05-19T00:00:00Z",
      "orderBy": "start/dateTime asc"
    }
  }
}
Updating a Calendar Event
Update an existing event's details:
Node Configuration:
{
  "integration_service": "outlook",
  "resource": "calendar",
  "operation": "update",
  "parameters": {
    "eventId": "AAMkAGVmMDEzMTM4LTZmYWUtNDdkNC1hMDZiLTU1OGY5OTZhYmY4OABGAAAAAAAiQ8W967B7TKBjgx9rVEURBwAiIsqMbYjsT5e-T7KzowPTAAAAAAENAAAiIsqMbYjsT5e-T7KzowPTAAAbMOqHAAA=",
    "updateFields": {
      "subject": "URGENT: Security Incident Review",
      "location": "Executive Conference Room",
      "start": "2024-05-15T13:30:00",
      "end": "2024-05-15T15:30:00",
      "timeZone": "Eastern Standard Time",
      "bodyContent": "<p><strong>URGENT UPDATE:</strong> Meeting extended to 2 hours and moved to Executive Conference Room. CISO will attend.</p><p>Meeting to review the security incident from last week.</p><p>Please bring all relevant documentation.</p>",
      "importance": "high"
    }
  }
}
Example: Contact Management
Creating a Contact
Create a new contact with detailed information:
Node Configuration:
{
  "integration_service": "outlook",
  "resource": "contact",
  "operation": "create",
  "parameters": {
    "givenName": "Jane",
    "surname": "Doe",
    "additionalFields": {
      "emailAddresses": [
        {
          "address": "[email protected]",
          "name": "Jane Doe"
        },
        {
          "address": "[email protected]",
          "name": "Jane Doe (Personal)"
        }
      ],
      "businessPhones": ["+1 (555) 123-4567"],
      "mobilePhone": "+1 (555) 987-6543",
      "jobTitle": "Chief Information Security Officer",
      "companyName": "Acme Corporation",
      "department": "Information Security",
      "officeLocation": "New York Office"
    }
  }
}
Retrieving Contacts
Search for contacts:
Node Configuration:
{
  "integration_service": "outlook",
  "resource": "contact",
  "operation": "getAll",
  "parameters": {
    "returnAll": false,
    "limit": 20,
    "filter": {
      "filterString": "startswith(companyName,'Acme')",
      "orderBy": "surname asc"
    }
  }
}
Updating a Contact
Update an existing contact's information:
Node Configuration:
{
  "integration_service": "outlook",
  "resource": "contact",
  "operation": "update",
  "parameters": {
    "contactId": "AAMkAGVmMDEzMTM4LTZmYWUtNDdkNC1hMDZiLTU1OGY5OTZhYmY4OABGAAAAAAAiQ8W967B7TKBjgx9rVEURBwAiIsqMbYjsT5e-T7KzowPTAAAAAAEOAAAiIsqMbYjsT5e-T7KzowPTAAAYjQx1AAA=",
    "updateFields": {
      "jobTitle": "Head of Cybersecurity",
      "mobilePhone": "+1 (555) 987-6543",
      "companyName": "Acme Security Solutions"
    }
  }
}
Example: Message Rule Management
Message rules allow you to automatically organize and process incoming emails based on specific conditions. This is particularly useful for security teams to automatically categorize alerts, forward critical notifications, or organize emails into specific folders.
Creating a Message Rule
Create a rule to automatically move security alerts to a dedicated folder:
Node Configuration:
{
  "integration_service": "outlook",
  "resource": "messageRule",
  "operation": "create",
  "parameters": {
    "displayName": "Security Alert Auto-Organization",
    "sequence": 1,
    "isEnabled": true,
    "conditions": {
      "subjectContains": ["SECURITY ALERT", "CRITICAL VULNERABILITY", "INCIDENT"],
      "fromAddresses": ["[email protected]", "[email protected]"],
      "importance": "high"
    },
    "actions": {
      "moveToFolder": "AAMkAGVmMDEzMTM4LTZmYWUtNDdkNC1hMDZiLTU1OGY5OTZhYmY4OABGAAAAAAAiQ8W967B7TKBjgx9rVEURBwAiIsqMbYjsT5e-T7KzowPTAAAAAAEMAAAiIsqMbYjsT5e-T7KzowPTAAAYbvZuAAA=",
      "markAsRead": false,
      "markImportance": "high",
      "stopProcessingRules": true
    }
  }
}
Creating a Rule with Forwarding Action
Create a rule to forward critical security incidents to the security team:
Node Configuration:
{
  "integration_service": "outlook",
  "resource": "messageRule",
  "operation": "create",
  "parameters": {
    "displayName": "Critical Incident Forwarding",
    "sequence": 2,
    "isEnabled": true,
    "conditions": {
      "subjectContains": ["CRITICAL INCIDENT", "BREACH DETECTED", "EMERGENCY"],
      "bodyOrSubjectContains": ["immediate action required", "urgent response needed"]
    },
    "actions": {
      "forwardTo": ["[email protected]", "[email protected]"],
      "markImportance": "high",
      "copyToFolder": "AAMkAGVmMDEzMTM4LTZmYWUtNDdkNC1hMDZiLTU1OGY5OTZhYmY4OABGAAAAAAAiQ8W967B7TKBjgx9rVEURBwAiIsqMbYjsT5e-T7KzowPTAAAAAAEMAAAiIsqMbYjsT5e-T7KzowPTAAAYbvZuAAA="
    },
    "exceptions": {
      "senderContains": ["test", "demo"],
      "subjectContains": ["TEST", "DEMO"]
    }
  }
}
Listing Message Rules
Retrieve all existing message rules:
Node Configuration:
{
  "integration_service": "outlook",
  "resource": "messageRule",
  "operation": "list",
  "parameters": {
    "top": 20,
    "skip": 0
  }
}
Updating a Message Rule
Modify an existing rule to add new conditions:
Node Configuration:
{
  "integration_service": "outlook",
  "resource": "messageRule",
  "operation": "update",
  "parameters": {
    "ruleId": "AAMkAGVmMDEzMTM4LTZmYWUtNDdkNC1hMDZiLTU1OGY5OTZhYmY4OABGAAAAAAAiQ8W967B7TKBjgx9rVEURBwAiIsqMbYjsT5e-T7KzowPTAAAAAAEMAAAiIsqMbYjsT5e-T7KzowPTAAAYbvZuAAA=",
    "displayName": "Enhanced Security Alert Auto-Organization",
    "isEnabled": true,
    "conditions": {
      "subjectContains": ["SECURITY ALERT", "CRITICAL VULNERABILITY", "INCIDENT", "MALWARE DETECTED"],
      "fromAddresses": ["[email protected]", "[email protected]", "[email protected]"],
      "importance": "high",
      "hasAttachments": false
    },
    "actions": {
      "moveToFolder": "AAMkAGVmMDEzMTM4LTZmYWUtNDdkNC1hMDZiLTU1OGY5OTZhYmY4OABGAAAAAAAiQ8W967B7TKBjgx9rVEURBwAiIsqMbYjsT5e-T7KzowPTAAAAAAEMAAAiIsqMbYjsT5e-T7KzowPTAAAYbvZuAAA=",
      "markAsRead": false,
      "markImportance": "high",
      "stopProcessingRules": true
    }
  }
}
Example: Mail Folder Management
Mail folders help organize emails into logical categories. This is essential for security teams to maintain organized archives of security communications, incident reports, and compliance documentation.
Creating a Mail Folder
Create a new folder for security incident tracking:
Node Configuration:
{
  "integration_service": "outlook",
  "resource": "mailFolder",
  "operation": "create",
  "parameters": {
    "displayName": "Security Incidents 2024",
    "isHidden": false
  }
}
Creating a Subfolder
Create a subfolder within an existing folder:
Node Configuration:
{
  "integration_service": "outlook",
  "resource": "mailFolder",
  "operation": "create",
  "parameters": {
    "displayName": "Critical Incidents",
    "parentFolderId": "AAMkAGVmMDEzMTM4LTZmYWUtNDdkNC1hMDZiLTU1OGY5OTZhYmY4OABGAAAAAAAiQ8W967B7TKBjgx9rVEURBwAiIsqMbYjsT5e-T7KzowPTAAAAAAEMAAAiIsqMbYjsT5e-T7KzowPTAAAYbvZuAAA=",
    "isHidden": false
  }
}
Listing All Mail Folders
Retrieve all top-level mail folders:
Node Configuration:
{
  "integration_service": "outlook",
  "resource": "mailFolder",
  "operation": "getAll",
  "parameters": {
    "top": 50,
    "select": "id,displayName,childFolderCount,totalItemCount,unreadItemCount",
    "orderby": "displayName asc"
  }
}
Listing Child Folders
Get all subfolders of a specific parent folder:
Node Configuration:
{
  "integration_service": "outlook",
  "resource": "mailFolder",
  "operation": "getAll",
  "parameters": {
    "parentFolderId": "AAMkAGVmMDEzMTM4LTZmYWUtNDdkNC1hMDZiLTU1OGY5OTZhYmY4OABGAAAAAAAiQ8W967B7TKBjgx9rVEURBwAiIsqMbYjsT5e-T7KzowPTAAAAAAEMAAAiIsqMbYjsT5e-T7KzowPTAAAYbvZuAAA=",
    "top": 20,
    "select": "id,displayName,totalItemCount",
    "filter": "totalItemCount gt 0"
  }
}
Getting a Specific Mail Folder
Retrieve details of a specific folder:
Node Configuration:
{
  "integration_service": "outlook",
  "resource": "mailFolder",
  "operation": "get",
  "parameters": {
    "folderId": "inbox",
    "additionalFields": {
      "select": "id,displayName,totalItemCount,unreadItemCount,childFolderCount",
      "expand": "childFolders"
    }
  }
}
Updating a Mail Folder
Rename a mail folder:
Node Configuration:
{
  "integration_service": "outlook",
  "resource": "mailFolder",
  "operation": "update",
  "parameters": {
    "folderId": "AAMkAGVmMDEzMTM4LTZmYWUtNDdkNC1hMDZiLTU1OGY5OTZhYmY4OABGAAAAAAAiQ8W967B7TKBjgx9rVEURBwAiIsqMbYjsT5e-T7KzowPTAAAAAAEMAAAiIsqMbYjsT5e-T7KzowPTAAAYbvZuAAA=",
    "displayName": "Security Incidents Archive 2024",
    "isHidden": true
  }
}
Example: Attachment Management
Attachments often contain critical security information such as incident reports, vulnerability scans, or forensic evidence. The attachment operations allow you to retrieve and analyze these files programmatically.
Listing Email Attachments
Retrieve all attachments from a specific security incident email:
Node Configuration:
{
  "integration_service": "outlook",
  "resource": "attachment",
  "operation": "list",
  "parameters": {
    "messageId": "AAMkAGVmMDEzMTM4LTZmYWUtNDdkNC1hMDZiLTU1OGY5OTZhYmY4OABGAAAAAAAiQ8W967B7TKBjgx9rVEURBwAiIsqMbYjsT5e-T7KzowPTAAAAAAEMAAAiIsqMbYjsT5e-T7KzowPTAAAYbvZuAAA=",
    "select": "id,name,contentType,size,lastModifiedDateTime",
    "top": 10
  }
}
Filtering Attachments by Type
List only PDF attachments from an email:
Node Configuration:
{
  "integration_service": "outlook",
  "resource": "attachment",
  "operation": "list",
  "parameters": {
    "messageId": "AAMkAGVmMDEzMTM4LTZmYWUtNDdkNC1hMDZiLTU1OGY5OTZhYmY4OABGAAAAAAAiQ8W967B7TKBjgx9rVEURBwAiIsqMbYjsT5e-T7KzowPTAAAAAAEMAAAiIsqMbYjsT5e-T7KzowPTAAAYbvZuAAA=",
    "filter": "contentType eq 'application/pdf'",
    "select": "id,name,size,contentType"
  }
}
Getting a Specific Attachment
Retrieve details and content of a specific attachment:
Node Configuration:
{
  "integration_service": "outlook",
  "resource": "attachment",
  "operation": "get",
  "parameters": {
    "messageId": "AAMkAGVmMDEzMTM4LTZmYWUtNDdkNC1hMDZiLTU1OGY5OTZhYmY4OABGAAAAAAAiQ8W967B7TKBjgx9rVEURBwAiIsqMbYjsT5e-T7KzowPTAAAAAAEMAAAiIsqMbYjsT5e-T7KzowPTAAAYbvZuAAA=",
    "attachmentId": "AAMkAGVmMDEzMTM4LTZmYWUtNDdkNC1hMDZiLTU1OGY5OTZhYmY4OABGAAAAAAAiQ8W967B7TKBjgx9rVEURBwAiIsqMbYjsT5e-T7KzowPTAAAAAAEMAAAiIsqMbYjsT5e-T7KzowPTAAAYbvZuAAA=",
    "select": "id,name,contentType,size,contentBytes"
  }
}
Processing Attachments in Workflows
Use template variables to process attachment information:
Input Data from Previous Node:
{
  "incident": {
    "id": "INC-2024-001",
    "severity": "critical",
    "messageId": "AAMkAGVmMDEzMTM4LTZmYWUtNDdkNC1hMDZiLTU1OGY5OTZhYmY4OABGAAAAAAAiQ8W967B7TKBjgx9rVEURBwAiIsqMbYjsT5e-T7KzowPTAAAAAAEMAAAiIsqMbYjsT5e-T7KzowPTAAAYbvZuAAA="
  }
}
Node Configuration with Template Variables:
{
  "integration_service": "outlook",
  "resource": "attachment",
  "operation": "list",
  "parameters": {
    "messageId": "{{incident.messageId}}",
    "filter": "size gt 1024 and (contentType eq 'application/pdf' or contentType eq 'application/vnd.openxmlformats-officedocument.spreadsheetml.sheet')",
    "select": "id,name,contentType,size",
    "top": 5
  }
}
Integration in Workflow Context
The Outlook integration is particularly powerful when combined with other nodes in a workflow:
Common Workflow Patterns:
-
Security Alert Notifications:
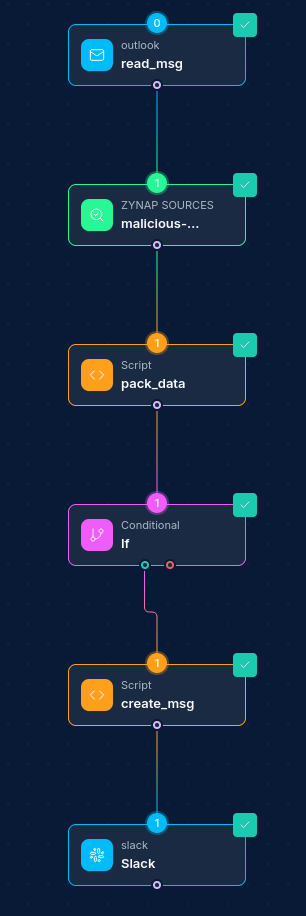
- Security Scan Node → Script Node (analyze results) → If/Else Node (severity check) → Outlook Integration Node (send email alert)
-
Scheduled Reporting:
- Schedule Node → Script Node (generate report) → Outlook Integration Node (send email with attachment)
-
Email Processing Pipeline:
- Webhook Node (trigger) → Outlook Integration Node (get emails) → Script Node (analyze content) → Outlook Integration Node (send responses)
-
Incident Response Coordination:
- Alert Node → Script Node (incident details) → Outlook Integration Node (create calendar event) → Outlook Integration Node (send email to team)
-
Contact Synchronization:
- Database Node → Script Node (format contacts) → Outlook Integration Node (create/update contacts)
Troubleshooting Authentication
OAuth2
| Issue | Resolution |
|---|---|
| Token expired | The integration automatically refreshes tokens when possible. If this fails, reconnect the credential by clicking "Authorize" again. |
| Insufficient permissions | Verify that all required permissions are granted in Azure App Registration. You may need to re-consent to permissions. |
| Invalid client ID/secret | Double-check the client ID and client secret from Azure. Note that secrets expire and may need to be regenerated. |
| Redirect URI mismatch | Ensure the redirect URI in Azure exactly matches the one expected by NINA. |
| Tenant restrictions | For multi-tenant apps, ensure your Azure AD tenant allows the application access. |
| Consent issues | Ensure you're signing in with an account that has sufficient privileges to grant consent. |
Username & Password (ROPC)
| Issue | Resolution |
|---|---|
AADSTS50076 — MFA required | ROPC does not support MFA. Disable MFA for this account or use OAuth2 / Client Credentials instead. |
AADSTS7000218 — Public client flow not enabled | Enable "Allow public client flows" in Azure app Authentication settings, or provide a client secret. |
AADSTS50034 — Account not found | Verify the username is a valid UPN in the tenant. Personal Microsoft accounts (@outlook.com, @hotmail.com) are not supported. |
AADSTS65001 — Consent not granted | An admin must grant consent for the delegated permissions on the app registration. |
Client Credentials (App-Only)
| Issue | Resolution |
|---|---|
403 ErrorAccessDenied on Graph API calls | The app likely has Delegated permissions instead of Application permissions. Add the correct Application permissions and grant admin consent. |
AADSTS7000215 — Invalid client secret | Double-check the client secret value (not the secret ID). Secrets expire — regenerate if needed. |
404 or ErrorInvalidUser | The userPrincipalName does not match any user in the tenant. Verify the email address. |
| Access to unintended mailboxes | By default, app-only permissions grant access to all mailboxes. Use an Application Access Policy to restrict scope. |
General
| Issue | Resolution |
|---|---|
| Connection issues | Check network connectivity to Microsoft Graph API endpoints. |
| Request timeout | Microsoft Graph API can have timeouts. Consider implementing retry logic in workflows. |
Best Practices
-
Choose the Right Auth Type: Use OAuth2 when possible. Use ROPC only for accounts without MFA/OAuth2 setup. Use Client Credentials for service-to-service automation.
-
Restrict App-Only Access: When using Client Credentials, work with your Exchange admin to create Application Access Policies that limit which mailboxes the app can access.
-
Handle Attachments Carefully: Base64-encode file attachments correctly and set the appropriate content type.
-
Leverage Template Variables: Use
{{variable_name}}syntax to create dynamic, personalized email content. -
Filter Email Retrieval: When using "Get All Emails", always apply appropriate filters to limit the result set.
-
Set Appropriate Timeouts: For operations involving large attachments or many recipients, allow for longer execution times.
-
Error Handling: Implement error handling for rate limiting, authentication failures, and other API issues.
-
Manage Credentials Carefully: Regularly rotate client secrets in Azure and update your credentials in NINA. ROPC credentials should be rotated when the user's password changes.
-
Use Importance Flags Wisely: Reserve "high" importance for truly urgent messages to prevent recipient fatigue.
-
Respect Calendar Availability: Check recipients' availability before scheduling calendar events.
-
Process HTML Content Safely: When generating HTML email content, sanitize any user-provided input to prevent issues.
Updated: 2026-05-06