Microsoft Entra ID Integration Guide
Overview
The Microsoft Entra ID integration allows your NINA workflows to seamlessly connect with Microsoft Entra ID (formerly Azure Active Directory) for comprehensive identity and access management operations. This integration enables you to create, retrieve, update, and delete users and groups, manage group memberships, and perform advanced identity management tasks directly from your workflows.
Microsoft Entra ID is Microsoft's cloud-based identity and access management service that helps organizations secure and manage user identities, access to applications, and resources. The NINA integration provides automated capabilities for user lifecycle management, group administration, and identity governance processes.
Status
We currently support comprehensive user and group management operations, including:
- User Management: Create, retrieve, update, delete, and search for users with advanced filtering
- Password Management: Reset user passwords with configurable sign-in policies
- Session Management: Revoke all sign-in sessions and invalidate refresh tokens for a user
- Group Management: Create, retrieve, update, delete, and search for groups (both security and Microsoft 365 groups)
- Group Membership: Add and remove users from groups for access control
- Advanced Search: Powerful OData filtering and field selection capabilities
- Dynamic Field Loading: Real-time user and group selection for workflow configuration
The integration supports:
- Complete User Lifecycle: From creation with temporary passwords to deletion
- Security Operations: Password resets and session revocation for incident response
- Flexible User Profiles: Support for standard and additional user attributes including personal details, job information, and contact data
- Group Types: Both security groups and Microsoft 365 groups (Unified groups)
- Membership Management: Efficient user-to-group association operations
- Advanced Querying: OData filters for precise data retrieval and complex search scenarios
Credential Configuration
Before using the Microsoft Entra ID integration in your workflows, you need to configure credentials for authentication. The integration uses OAuth 2.0 Client Credentials flow for secure API access.
Authentication Method
Client Credentials (Recommended)
The Microsoft Entra ID integration uses the OAuth 2.0 Client Credentials flow for authentication:
| Field | Description | Example |
|---|---|---|
| Client ID | Application (client) ID from Azure portal | 12345678-1234-1234-1234-123456789012 |
| Client Secret | Client secret from Azure portal | abc123def456ghi789jkl012mno345pqr678stu |
| Tenant ID | Directory (tenant) ID from Azure portal | 87654321-4321-4321-4321-210987654321 |
How to get your credentials:
-
Register an Application in Azure Portal:
- Go to the Azure Portal
- Navigate to "Microsoft Entra ID" (or "Azure Active Directory")
- Go to "App registrations" in the left sidebar
- Click "New registration"
- Provide a name for your application (e.g., "NINA Integration")
- Select "Accounts in this organizational directory only"
- Click "Register"
-
Get Client ID and Tenant ID:
- After registration, you'll see the "Application (client) ID" - this is your Client ID
- You'll also see the "Directory (tenant) ID" - this is your Tenant ID
- Copy both values
-
Create a Client Secret:
- In your app registration, go to "Certificates & secrets" in the left sidebar
- Click "New client secret" under "Client secrets"
- Add a description (e.g., "NINA Integration Secret")
- Choose an expiration period
- Click "Add"
- Important: Copy the secret value immediately (it won't be shown again)
-
Configure API Permissions:
- Go to "API permissions" in the left sidebar
- Click "Add a permission"
- Select "Microsoft Graph"
- Choose "Application permissions"
- Add the following permissions:
User.ReadWrite.All- For user management operationsUser.RevokeSessions.All- For revoking user sign-in sessionsGroup.ReadWrite.All- For group management operationsDirectory.ReadWrite.All- For directory operations (if needed)
- Click "Grant admin consent" for your organization
Creating a Microsoft Entra ID Credential
-
Navigate to the Credentials section in NINA
-
Click Add New Credential
-
Fill in the credential details:
- Name: A descriptive name (e.g., "Microsoft Entra ID Production")
- Description: Optional details about the credential's purpose
- Integration Service: Select "Microsoft Entra ID"
- Auth Type: Select "Client Credentials"
- Client ID: Enter your Application (client) ID
- Client Secret: Enter your client secret
- Tenant ID: Enter your Directory (tenant) ID
-
Click Test Connection to verify credentials
-
Click Save to store the credential
Supported Resources and Operations
The Microsoft Entra ID integration supports the following resources and operations:
User
| Operation | Description |
|---|---|
| Create | Creates a new user in the directory with specified attributes |
| Get | Retrieves details of a specific user by ID or User Principal Name |
| Update | Updates an existing user's attributes and properties |
| Delete | Deletes a user from the directory |
| Get All | Retrieves multiple users with optional filtering and pagination |
| Reset Password | Resets a user's password with configurable force-change and MFA policies |
| Revoke Sign-In Sessions | Invalidates all refresh tokens and session cookies for a user |
Group
| Operation | Description |
|---|---|
| Create | Creates a new security group or Microsoft 365 group |
| Get | Retrieves details of a specific group by ID |
| Update | Updates an existing group's properties |
| Delete | Deletes a group from the directory |
| Get All | Retrieves multiple groups with optional filtering and pagination |
| Add Member | Adds a user to a group for access control |
| Remove Member | Removes a user from a group |
Parameter Merging and Templating
The Microsoft Entra ID integration takes full advantage of NINA's parameter merging and templating capabilities:
Parameter Sources (in order of precedence)
- Node Parameters: Parameters configured directly in the Microsoft Entra ID Integration Node
- Extracted Parameters: Parameters automatically extracted from the input data
- Input Data: The complete input data from upstream nodes
When a Microsoft Entra ID Integration Node executes:
- It combines parameters from all sources
- Node parameters take precedence over extracted parameters
- Template variables within parameters are processed (using
{{variable_name}}syntax) - The combined parameters are used to execute the Microsoft Entra ID operation
Example: Creating a New User
Basic User Creation
Below is an example of creating a new user account with essential information:
Node Configuration:
{
  "integration_service": "microsoft-entra",
  "resource": "user",
  "operation": "create",
  "parameters": {
    "accountEnabled": true,
    "displayName": "John Doe",
    "mailNickname": "johndoe",
    "userPrincipalName": "[email protected]",
    "passwordProfile": {
      "password": "TempPassword123!",
      "forceChangePasswordNextSignIn": true
    },
    "additionalFields": {
      "givenName": "John",
      "surname": "Doe",
      "jobTitle": "Software Engineer",
      "department": "IT",
      "mail": "[email protected]",
      "mobilePhone": "+1234567890"
    }
  }
}
User Creation with Template Variables
You can use template variables to create users dynamically based on input data:
{
  "integration_service": "microsoft-entra",
  "resource": "user",
  "operation": "create",
  "parameters": {
    "accountEnabled": true,
    "displayName": "{{first_name}} {{last_name}}",
    "mailNickname": "{{username}}",
    "userPrincipalName": "{{email}}",
    "passwordProfile": {
      "password": "{{temporary_password}}",
      "forceChangePasswordNextSignIn": true
    },
    "additionalFields": {
      "givenName": "{{first_name}}",
      "surname": "{{last_name}}",
      "jobTitle": "{{job_title}}",
      "department": "{{department}}"
    }
  }
}
Example: Managing Group Membership
Adding a User to a Security Group
Below is an example of adding a user to a security group for access control:
Node Configuration:
{
  "integration_service": "microsoft-entra",
  "resource": "group",
  "operation": "addMember",
  "parameters": {
    "groupId": "{{security_group_id}}",
    "userId": "{{user_id}}"
  }
}
Creating a Microsoft 365 Group
{
  "integration_service": "microsoft-entra",
  "resource": "group",
  "operation": "create",
  "parameters": {
    "displayName": "Project Alpha Team",
    "mailNickname": "projectalpha",
    "groupTypes": "Unified",
    "mailEnabled": true,
    "securityEnabled": false,
    "additionalFields": {
      "description": "Collaboration group for Project Alpha development team",
      "visibility": "Private"
    }
  }
}
Example: Advanced User Search
Searching Users with OData Filters
You can perform advanced searches using OData filter queries:
{
  "integration_service": "microsoft-entra",
  "resource": "user",
  "operation": "getAll",
  "parameters": {
    "returnAll": false,
    "limit": 100,
    "options": {
      "filter": "department eq 'IT' and accountEnabled eq true",
      "select": "id,displayName,mail,userPrincipalName,department,jobTitle"
    }
  }
}
Common OData Filter Examples
- Filter by Department:
department eq 'Sales' - Filter by Job Title:
jobTitle eq 'Manager' - Filter Active Users:
accountEnabled eq true - Filter by Location:
officeLocation eq 'New York' - Complex Filter:
department eq 'IT' and accountEnabled eq true and jobTitle ne 'Intern'
Example: User Profile Updates
Updating User Information
{
  "integration_service": "microsoft-entra",
  "resource": "user",
  "operation": "update",
  "parameters": {
    "userId": "{{user_id}}",
    "updateFields": {
      "jobTitle": "Senior Software Engineer",
      "department": "Engineering",
      "officeLocation": "Building A, Floor 3"
    }
  }
}
Disabling a User Account
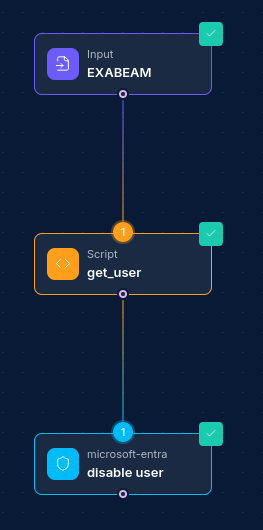
{
  "integration_service": "microsoft-entra",
  "resource": "user",
  "operation": "update",
  "parameters": {
    "userId": "{{user_id}}",
    "updateFields": {
      "accountEnabled": false
    }
  }
}
Example: Resetting a User's Password
Basic Password Reset
Below is an example of resetting a user's password, forcing them to change it on next sign-in:
Node Configuration:
{
  "integration_service": "microsoft-entra",
  "resource": "user",
  "operation": "resetPassword",
  "parameters": {
    "userId": "{{user_id}}",
    "newPassword": "TempP@ssw0rd!2024",
    "forceChangePasswordNextSignIn": true
  }
}
Password Reset with MFA Enforcement
You can also require the user to perform multi-factor authentication before changing their password:
{
  "integration_service": "microsoft-entra",
  "resource": "user",
  "operation": "resetPassword",
  "parameters": {
    "userId": "{{user_id}}",
    "newPassword": "{{temporary_password}}",
    "forceChangePasswordNextSignIn": true,
    "forceChangePasswordNextSignInWithMfa": true
  }
}
Note: The new password must meet Azure AD password complexity requirements. If the password doesn't meet requirements, the operation will return an error with details.
Example: Revoking User Sign-In Sessions
Revoking All Sessions
Below is an example of revoking all sign-in sessions for a user. This is commonly used for incident response when a user's account may be compromised, or when a device is lost or stolen:
Node Configuration:
{
  "integration_service": "microsoft-entra",
  "resource": "user",
  "operation": "revokeSignInSessions",
  "parameters": {
    "userId": "{{user_id}}"
  }
}
Note: After revoking sessions, there may be a small delay of a few minutes before tokens are fully invalidated. The user will need to re-authenticate on all applications and devices.
Best Practices
Security Considerations
- Principle of Least Privilege: Grant only the minimum required API permissions for your use case
- Secret Management: Store client secrets securely and rotate them regularly according to your organization's policy
- Monitoring: Monitor API usage and set up alerts for unusual activity patterns
Performance Optimization
- Batch Operations: Use the "Get All" operations with appropriate filters instead of multiple single-user queries
- Field Selection: Use the
selectparameter to retrieve only the fields you need, reducing response size and improving performance - Pagination: For large datasets, use pagination with appropriate limits to avoid timeouts
Error Handling
- Duplicate Users: Handle scenarios where user creation might fail due to existing userPrincipalName
- Permission Errors: Ensure your application has sufficient permissions for the operations you're performing
- Rate Limiting: Implement appropriate retry logic for rate limit responses from Microsoft Graph API
Data Management
- User Lifecycle: Implement proper user lifecycle management including onboarding, updates, and offboarding processes
- Group Hygiene: Regularly review and clean up unused groups and memberships
- Audit Trails: Maintain logs of identity management operations for compliance and security purposes
Troubleshooting
Common Issues
-
Authentication Failures
- Verify Client ID, Client Secret, and Tenant ID are correct
- Ensure admin consent has been granted for the required permissions
- Check that the client secret hasn't expired
-
Permission Denied Errors
- Verify that the application has the necessary Graph API permissions
- Ensure admin consent has been granted for application permissions
- Check that the service principal has sufficient directory role assignments if needed
-
User Creation Failures
- Ensure the userPrincipalName is unique and follows the correct format
- Verify that required fields are provided
- Check domain validation for the tenant
-
Group Operation Issues
- Verify group exists before attempting to add/remove members
- Ensure the user exists before adding to a group
- Check group type compatibility for operations
For additional support, consult the Microsoft Graph API documentation or contact your system administrator. Updated: 2026-04-16