Output Node Guide
Overview
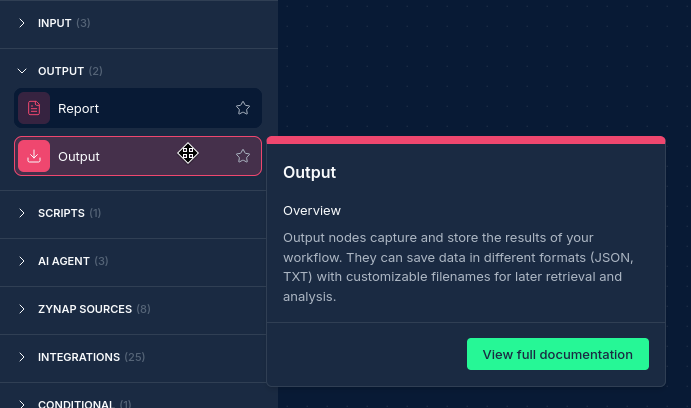
The Output Node is a terminal component of NINA workflows that captures and exports the final results of your workflow execution. It takes data from upstream nodes and saves it to files in specified formats, allowing you to retrieve and use the processed data outside of the workflow environment.
Use Cases
- Saving processed security data for reporting
- Creating downloadable reports from workflow analysis
- Generating formatted output files for integration with external systems
- Collecting and consolidating data from multiple workflow branches
Creating an Output Node
Basic Setup
- Drag an Output Node from the node palette onto your workflow canvas
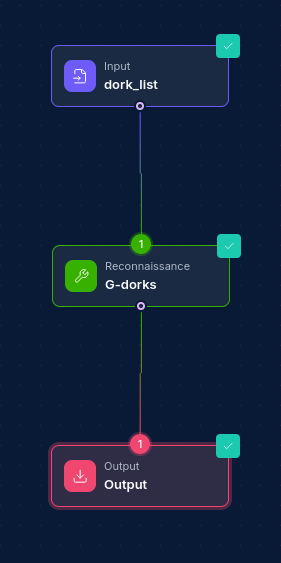
- Connect it to upstream nodes that produce the data you want to export
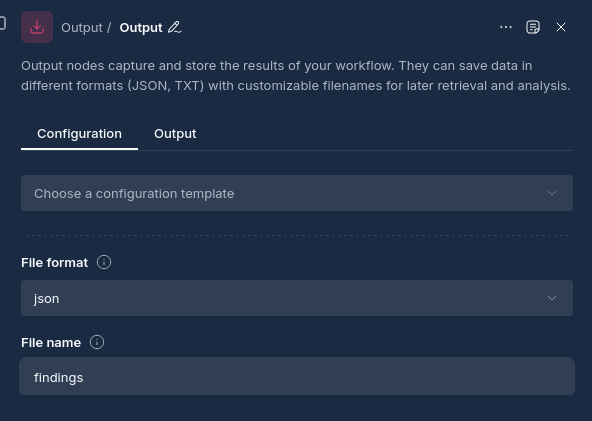
- Configure the output file format and filename
- Specify how the data should be processed and formatted
Required Configuration
Output Nodes require two essential configurations:
1. File Format
Specify the format for your output file:
- JSON: For structured data export
- CSV: For tabular data that can be opened in spreadsheets
- TXT: For plain text output
- XML: For structured markup data
- Custom: For specialized formats required by your workflow
2. Filename
Provide a descriptive filename for your output:
- Use descriptive names that indicate the content (e.g., "vulnerability-scan-results")
- Include relevant identifiers (e.g., "domain-analysis-2024-01-15")
- Ensure the filename is valid and doesn't contain special characters
Configuration Options
Node Properties
| Property | Description | Required |
|---|---|---|
| Name | A descriptive name for the node | Yes |
| File Format | The format for the output file (JSON, CSV, TXT, etc.) | Yes |
| Filename | The name of the output file to be generated | Yes |
Input Processing
Output Nodes automatically handle:
- Data Consolidation: Combining data from multiple input sources
- Format Conversion: Converting workflow data to the specified file format
- File Generation: Creating the output file in the workflow's storage volume
- Data Validation: Ensuring the output data is properly formatted
How Output Nodes Work
When a workflow reaches an Output Node:
- Input Validation: The node verifies that input data is available from upstream nodes
- Data Processing: The input data is processed according to the specified format
- File Creation: A file is created to handle file operations
- Data Export: The processed data is written to a file with the specified format and filename
- Storage: The output file is stored in the workflow's persistent volume
- Completion: The node completes, making the file available for download
Data Input Requirements
Input Paths
Output Nodes require at least one input connection from upstream nodes:
- Single Input: Process data from one upstream node
- Multiple Inputs: Consolidate data from several upstream nodes
- Data Validation: Ensure upstream nodes have completed successfully before processing
Supported Data Types
Output Nodes can process various data types:
- Structured Data: JSON objects, arrays, and nested structures
- Tabular Data: Rows and columns suitable for CSV export
- Text Data: Plain text content and logs
- Binary Data: Files and binary content (with appropriate formatting)
Best Practices
Naming Conventions
- Descriptive Names: Use clear, descriptive names for both the node and output filename
- Include Context: Add relevant context like dates, scan types, or target information
- Avoid Conflicts: Ensure filenames are unique within your workflow
File Format Selection
- JSON: Best for structured data that may be processed by other systems
- CSV: Ideal for tabular data that needs to be analyzed in spreadsheets
- TXT: Suitable for logs, reports, and human-readable output
- Consider Downstream Usage: Choose formats that match how the data will be used
Data Organization
- Consistent Structure: Ensure your data follows a consistent structure for reliable output
- Data Validation: Validate data quality before reaching the Output Node
- Error Handling: Use conditional nodes to handle edge cases before output
Examples
Example 1: Security Scan Results Export
Configuration:
- Name: "vulnerability-export"
- File Format: JSON
- Filename: "vulnerability-scan-results"
Input Data: Results from multiple security scanning tools Output: A JSON file containing consolidated vulnerability findings
Example 2: Domain Analysis Report
Configuration:
- Name: "domain-report"
- File Format: CSV
- Filename: "domain-analysis-report"
Input Data: Domain information from WHOIS and DNS analysis Output: A CSV file with domain details suitable for spreadsheet analysis
Example 3: Threat Intelligence Feed
Configuration:
- Name: "threat-intel-export"
- File Format: JSON
- Filename: "threat-indicators-feed"
Input Data: Processed threat intelligence from multiple sources Output: A structured JSON file for integration with security platforms
File Access and Download
Workflow Completion
Once your workflow completes:
- File Availability: Output files are available in the workflow execution results
- Download Access: Files can be downloaded through the NINA interface
- Persistent Storage: Files remain available for the configured retention period
- Multiple Formats: Multiple Output Nodes can create files in different formats
Performance Considerations
Next Steps
After configuring your Output Node:
- Test Execution: Run your workflow to verify the output format and content
- Download Verification: Check that generated files contain the expected data
- Integration Planning: Consider how output files will be used in downstream processes
- Automation Setup: Configure automated workflows to regularly generate reports
Related Nodes
Output Nodes work well with:
- Report Nodes: For generating formatted reports before file export
- Script Nodes: For data transformation and formatting before output
- Conditional Nodes: For conditional output based on workflow results
- Integration Nodes: For combining data from multiple sources before export Updated: 2026-01-20